How To Projects Hypertufa recipe and techniques

Hypertufa recipe and techniques

By Nancy Norris | May 1, 2023

Learn how to add amazing rocky features to your railroad

Email Newsletter

Get the newest photos, videos, stories, and more from Trains.com brands. Sign-up for email today!

Hypertufa recipe and techniques

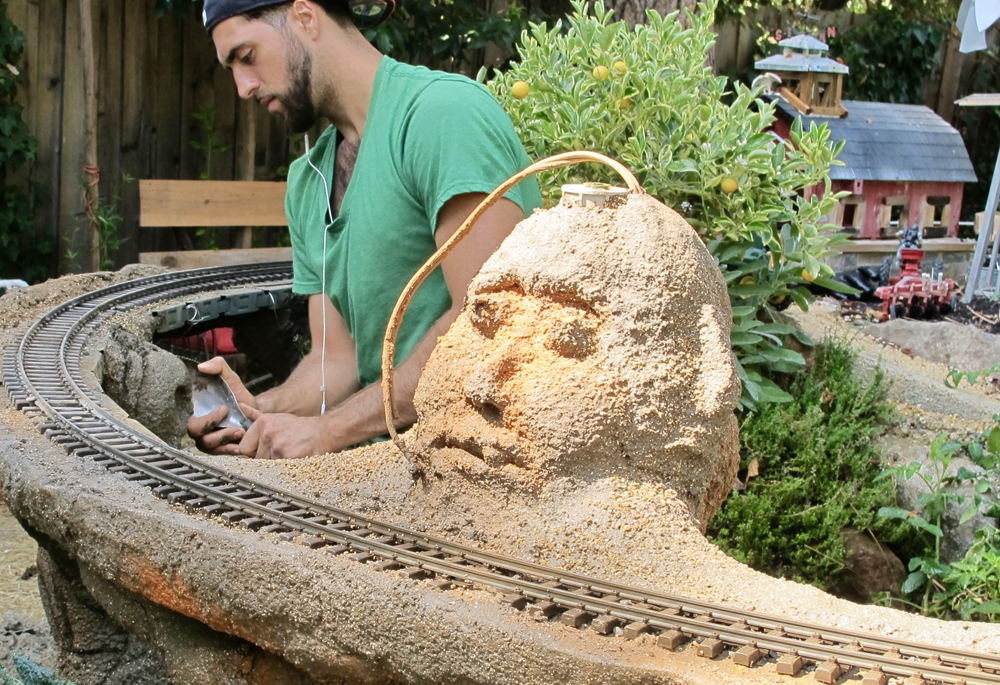
man on garden railroad near sculpture of human head
My helper, Nick, gives his version of “How to Mix and Apply Hypertufa” on two of my projects (Cretaceous Caves and the front yard gallery). Nancy Norris photo

How have you made structures and walls with hypertufa or similar cement products?

Two reports show four different applications for hypertufa. Ray Turner shows a picture of his helix mountain still unpainted for us to study; the final photo shows a magnificently finished set of bridges spanning the cement-product valley backdropped by Silicon Valley.

Get more ideas for using hypertufa in Nancy’s other article.

Hypertufa recipe

Equal parts:

Portland cement (type 1 or 2)

Peat moss

Vermiculite (or perlite)

Optional: powdered/liquid concrete coloring, gold fines, decomposed granite, etc.

Mix until the consistency of peanut butter.

Sculptor: Nick Schofield

Benicia, California

After applying an N95 mask, I prefer mixing the three materials dry initially. This ensures consistent mix and makes mixing substantially easier. Using a 4’x3’ rectangular tub I mix the materials with a hoe manually. (A cement mixer is an option if available.) Make sure to focus on leg quadricep, hamstring, and calve muscles pushing material back and forth, as opposed to solely using back and arms. This increases efficiency and will make getting out of bed the next day feasible. Physical mindfulness is crucial in any heavy lifting. Be strategic and cognizant. Use a dolly [hand truck] to transport heavy materials. Avoid arching your back;  instead, bend your legs. Stretching before starting your project is never a bad idea: 10 minutes of preparation can save you lots of time at the doctor’s office.

a man sculpting a concrete mixture
Nick chisels the “rock look” into just-hardened hypertufa. The irrigation pipe is hidden and a low-voltage cable is ready for a flickering-lighted Flintstones house on top. Nancy Norris photo

No soup either— you want to be able to build on it. The peat moss is highly hydrophilic. Depending on the desired amount of material, your water portion will vary, but don’t be afraid to give it a good saturation. It really sucks up the water and worst-case scenario, you can always add more dry material.

After you’re happy with your build, feel free to dress it up with more vermiculite on top [as on the irrigation-head sculpture]. Concrete color (liquid or powder version) works; I personally like tossing color powder on and lightly misting. Liquid could be nice for detailed painting or full soak saturations, blackening caves, for example.

a mixing trough with concrete, peat moss and vermiculite in it
I make hypertufa by mixing equal parts of Portland cement Type 1 or 2, vermiculite, and peat moss. If you enjoy sculpting with clay you will love it! [A bucket of gold fines or decomposed granite provides color and texture to the finished surface. Perlite can be substituted for vermiculite.] Nancy Norris photo
Hypertufa is much cheaper than stone to produce vast quantities of structures for outdoor applications. It’s versatile! Use it for creating artificial stone, character sculptures, retaining walls, overlay for disguising bricks, and just about anything you can imagine.

concrete coloring at a hardware store
Concrete coloring is available at most hardware stores. Nancy Norris photo

A combination of red and brown creates the coloring used to soften the gray look of cement. You can also crush up almost any material you can get to achieve just about any surface texture you like. Simply crush and toss, throw aggressively if you’re inclined, or pat the material in. (If the top coat texture is not applied with some pressure it will fall off.) Have fun and use your imagination.

Rebar with partially assembled structure
The job here was to hide the mechanics of metal rebar to create a strong structure that one could walk on and prevent accidents with climbing children. The overall mountain models a gallery to look like surrounding stone. Inside, turquoise blue stone shows serious rock sequence. Outside, hypertufa helps mold the habitat hard enough to hold up a “roof” over trains and the garden. Nancy Norris photo

Depending on the size of your project you may need to build in stages, always starting from your base foundation and working your way up. Have fun, test the limits, and be patient. Things will collapse but they can be rebuilt stronger.

Train on garden railroad runs through rocky feature
One technique I like is creating lots of oblong formations, allowing the material to dry over night or longer depending on local humidity. Coming back with a small chisel and following the contours replicating cracks and separation between rocks. You can let it then totally cure come back weeks later with the chisel and make more rigid edges for more realistic rock aesthetic. Nancy Norris photo

Just use caution — too much force could potentially cause collapse. If it happens consider reinforcements, rebar is a great option but any scrap metal can act as a skeletal structure increasing rigidity. Feel free to also use spare concrete scrap or other materials as part of your foundational structure to build on while semi-permanently eliminating clutter in the garden. I believe I covered the main points and lessons I’ve learned from hours upon hours of personal experimentation.

Casting call: Ray Turner

San Jose, California

large rock formation on garden railway
Here’s how I cast rock retaining walls in rubber molds using concrete, stack them up, and fill in the cracks with more material. Then I paint them with thin washes over and over until they look right. My helix still needs paint. Ray Turner photo


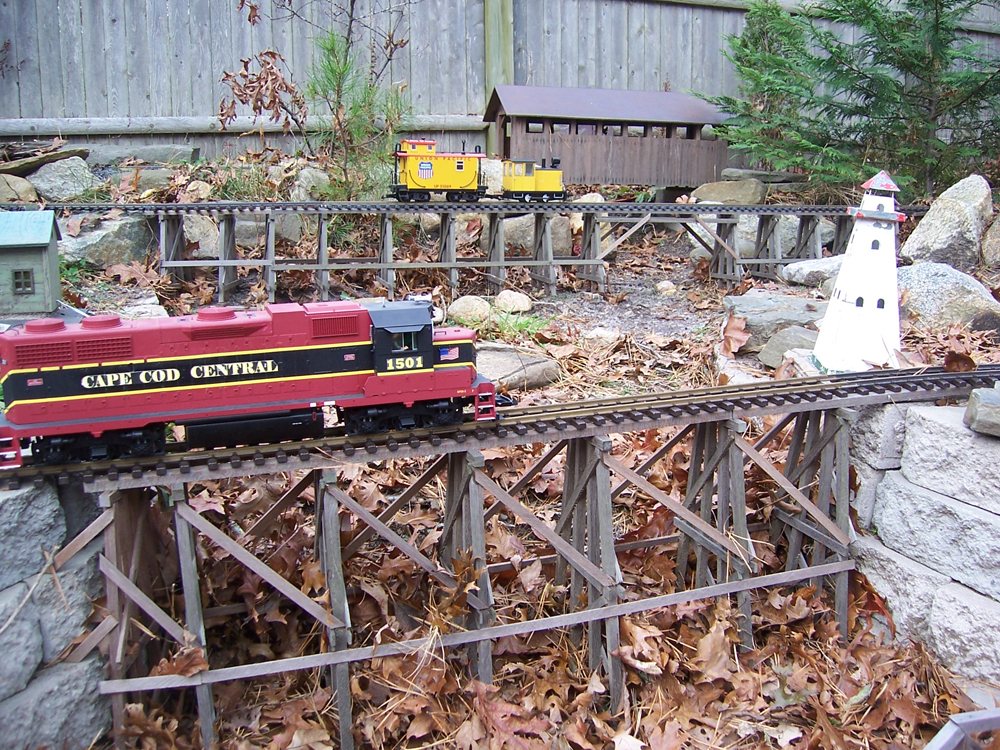
 train on trestle crossing rocky area on garden railway
Ray Turner explains how he created this rocky scene using rubber molds below. Ray Turner photo

How I use rubber molds:

1) Spray rubber molds with mold release (aka Pam or kitchen spray) and fill with a cement-sand mix, 1 part white or gray Portland cement and 2 parts sand.

2) When set, remove the “rocks” from the molds and place these cast segments of rock wall on the railroad and fill in cracks between them with more cement-sand mix. The structure that supports the rock castings can be rocks, cement blocks, plaster screen, or any suitable outdoor material.

3) Apply 10+ washes of various acrylic paint colors (I like Liquitex tubes), using one black wash to accent the cracks in the rocks. Use tubes of acrylic artist paints, applying lots of water to make the color transparent. The trick is to use several “natural” colors randomly applying them to different areas of the rocks. It’s difficult to describe in text, but easy — if tedious — to do. Hint: use some green sparingly on horizontal outcroppings to simulate grass/weeds.

You must login to submit a comment