The lost art of soldering was once an important skill for model railroaders.
What is soldering?
Choosing the right soldering tools
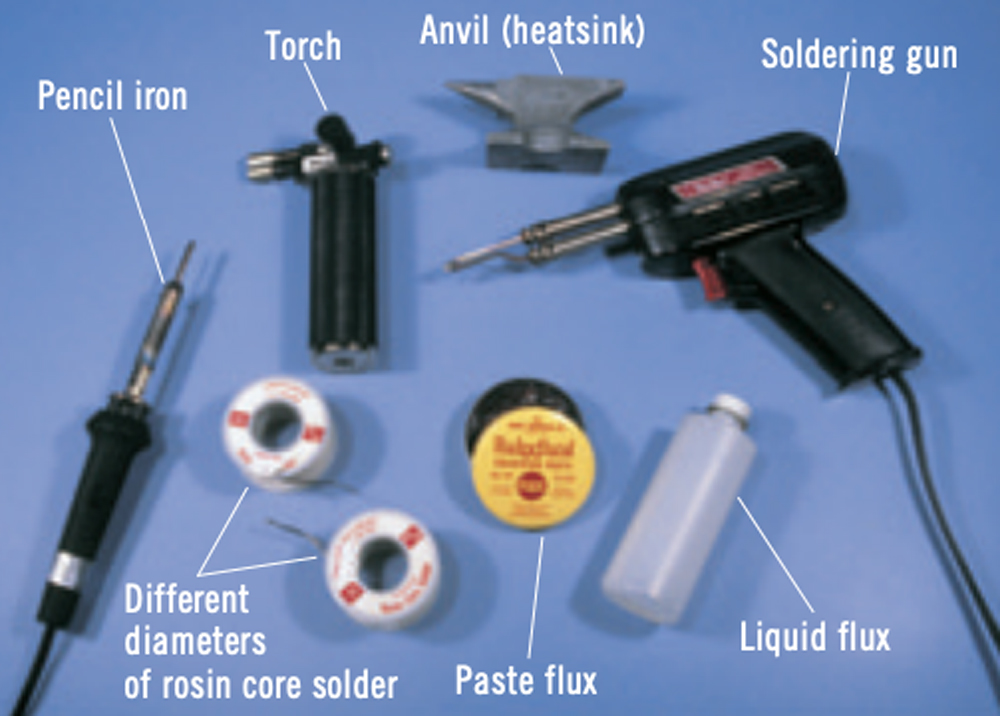
- Soldering guns have a pistol grip with a trigger to switch the heat on and off. Power ratings range from 75 to 200 watts, with some models featuring two heat levels controlled by the trigger. A focused lamp mounted below the tip illuminates the work. The soldering tip heats rapidly and remains hot for a few seconds after the trigger is released.
- Pencil irons are used for small soldering jobs involving electronic parts, wiring, and thin sheet-metal pieces where excess heat may damage or distort the component. Pencil irons consist of an insulated handle, heating element, and removable tips in various shapes. They come in two common power ratings, 15 or 30 watts. Some have interchangeable heating elements, while others have switches that select either power level. Pencil irons stay hot as long as they’re plugged into an electric outlet.
- Soldering irons are larger versions of the pencil iron, with power levels up to 150 watts. Their tips are large so they can be used for big soldering jobs. However, soldering guns have replaced these big irons for most modeling applications.
- Mini-torches are handheld tanks of gas or butane lighter fluid which can deliver a small, very hot flame to the work pieces. They’re ideal for soldering castings and heavy pieces of brass, but their high heat capability requires careful control, and the workplace must be well ventilated.
- Resistance soldering uses heat generated by an electrical current passing through a joint to melt the solder. A low-voltage heavy-duty transformer delivers current to a pair of carbon electrodes, built into insulated tweezers, which contact both sides of the pieces to be soldered. The current is switched on to quickly heat the joint until the solder flows, and off so the solder hardens as the joint cools.
Flux
Flux is a heat-activated chemical that removes oxides from metal surfaces. Non-corrosive rosin flux or more active acid types are sold at electronics and hardware stores. Rosin flux must be used for electronic and wiring jobs as its residue is inert. Acid flux is better for fabrication work, but its residue must be neutralized and cleaned off to prevent corrosion. Hollow-wire solders have cores of either acid or rosin flux, so make sure you buy the appropriate kind for the job.
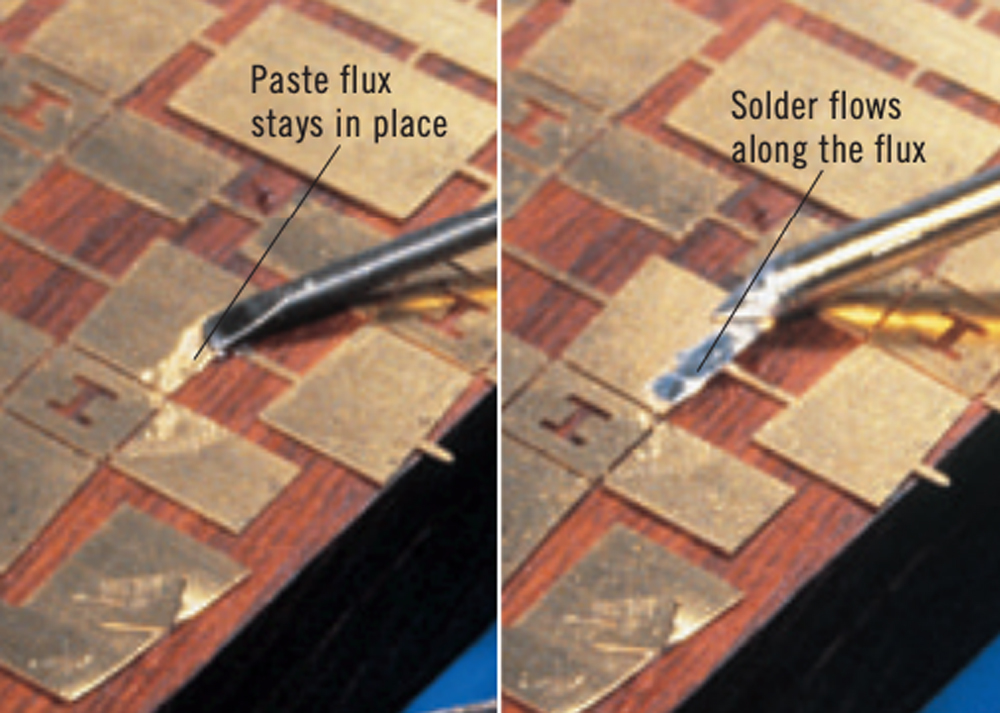
As the solder melts, the flux core spreads over the work piece and cleans it so the solder can flow. Paste flux has a smooth consistency that makes it easy to apply. It’s ideal for assembling etched-brass kits. Liquid flux may be applied with a small brush, making it particularly useful in corners and tight spaces where paste flux may be difficult to apply.
Heatsinks and cleanliness
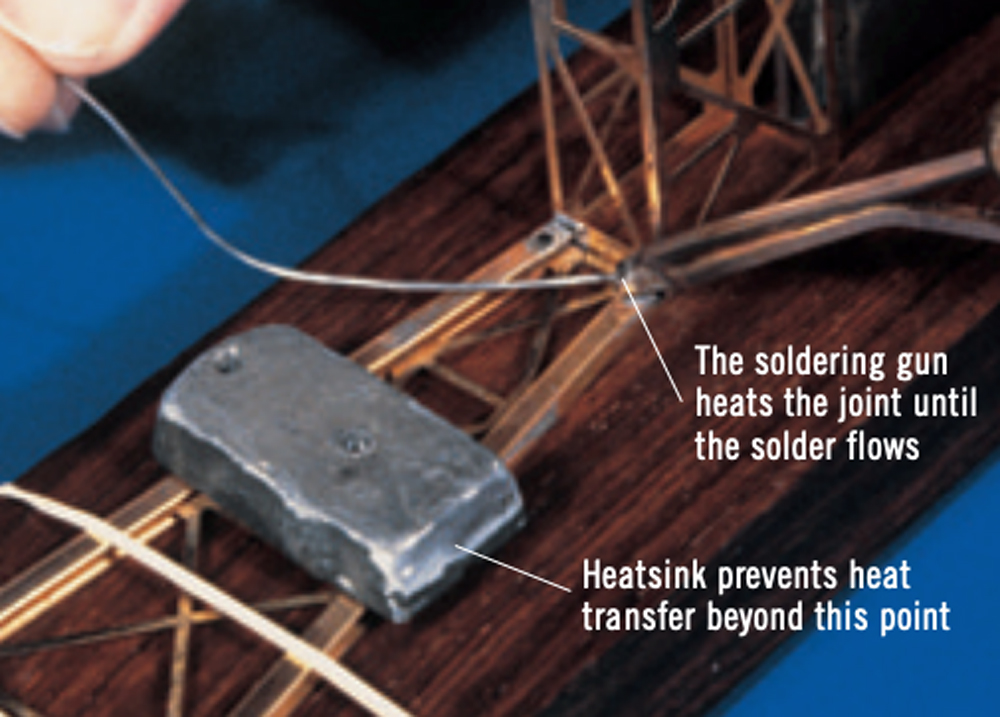
Heat spreads rapidly through metal so it’s important to control the area being heated. A heatsink slows the spread of heat so parts that are already soldered in place don’t loosen up as new ones are added. A metal weight near the worksite prevents any heat transfer that might loosen previous joints in the bracing. Wet tissue paper packed around a work area also makes a good heatsink.
Any soldering iron or gun must be kept clean to speed the heat transfer so you can get in and out quickly when working with heatsinks. As you use it, a soldering tip will develop a black scale that interferes with heat transfer and prevents it from holding solder. This scale can be easily cleaned off by rubbing the tip on a damp cloth or sponge.
Soldering techniques
Here are some of the soldering techniques you’ll need to assemble etched brass kits.
- Preparation begins with trimming a few parts at a time out of the large etched frame, or fret. Remove only the pieces you will need for the next assembly step as many items are small and easily lost. Study the parts to avoid confusing the fret tabs with the tiny tabs which hold pieces in alignment. Cut through the fret tabs with small tin snips, and file the edges smooth. Work carefully as the metal edges are sharp.
- Tinning is the process of lightly coating each piece of metal with flux and then with solder in the area to be joined. Completing the joint is a matter of aligning the two tinned pieces and applying heat so the solder flows together to form a strong bond.
- Tack soldering may be used to temporarily join two or three large pieces of metal to keep them from moving while you work on the main joint. The small temporary bond, or tack, is usually done near one end so the opposite end can be carefully aligned for final assembly.
- Seam soldering is used for corner joints that must be strong, even, and look solid when viewed from either side. A perfectly seamed corner has an even bead of solder along its entire length. Keeping the joint straight can be tricky.
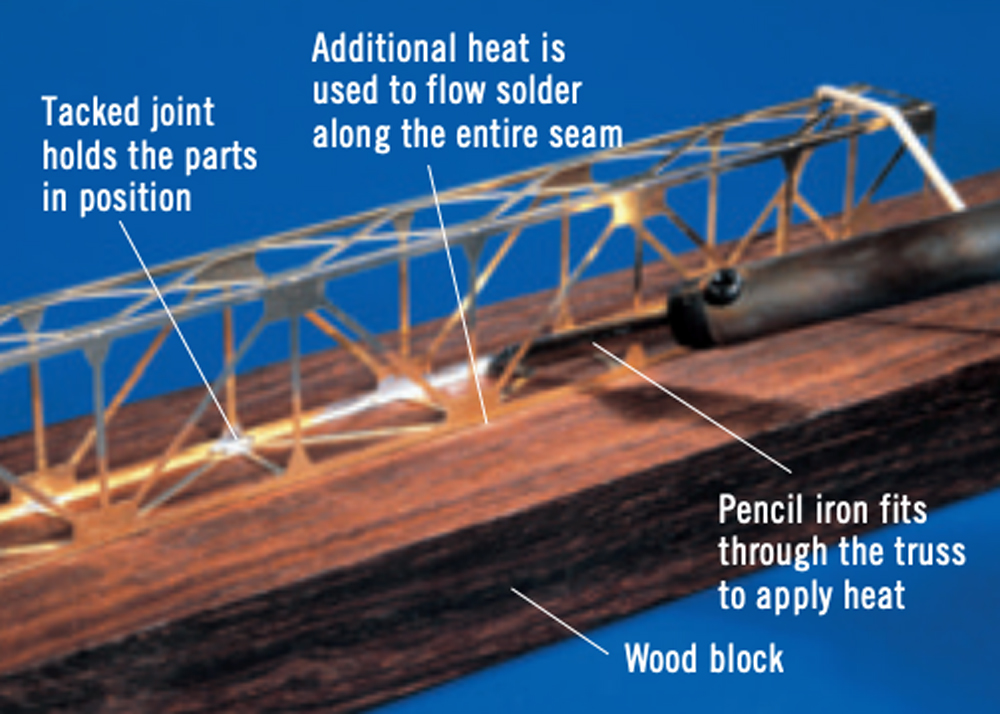
The main truss of my signal bridge has a rectangular cross-section. Three of its corners have thin brass tabs that allow the sides, bottom, and top to be folded at right angles without falling apart. The fourth corner (between one side and the bottom) must be soldered to complete the truss. To assemble this corner, I first tinned the inside edges of the side and bottom trusses which form the corner. I then tack-soldered the open seam in six places: at each end and at the four middle gusset plates. Next, I used rubber bands to hold the truss on a flat piece of wood to ensure alignment. Finally, starting in the middle and working outward, I heated the tinned corner members. Once the solder melted, I slid my pencil iron slowly along the seam, feeding in solder as necessary, until it was solid.
- Sweat soldering is used to join medium-to-large pieces of metal. Each piece is tinned, and the parts are positioned with their tinned sides against each other. Heat is applied to the center of the top sheet until the solder begins to melt.
A large soldering gun is ideal for this kind of application as it provides plenty of heat. The gun is gradually moved to the outer edges in a spiral pattern so that all the solder melts and hardens to bond the pieces. The trick here is to keep the parts from moving until the solder cools.
Heavy-duty soldering
So far we’ve talked about etched-brass kits made of shim stock, averaging .010″ thick. Modelers who work in the larger scales often use heavier materials ranging from 1 ⁄32″ to 1 ⁄16″ thick. Even the most powerful soldering irons can’t generate enough heat to solder these thicknesses, so modelers rely on small gas torches producing temperatures of 2,000 degrees.
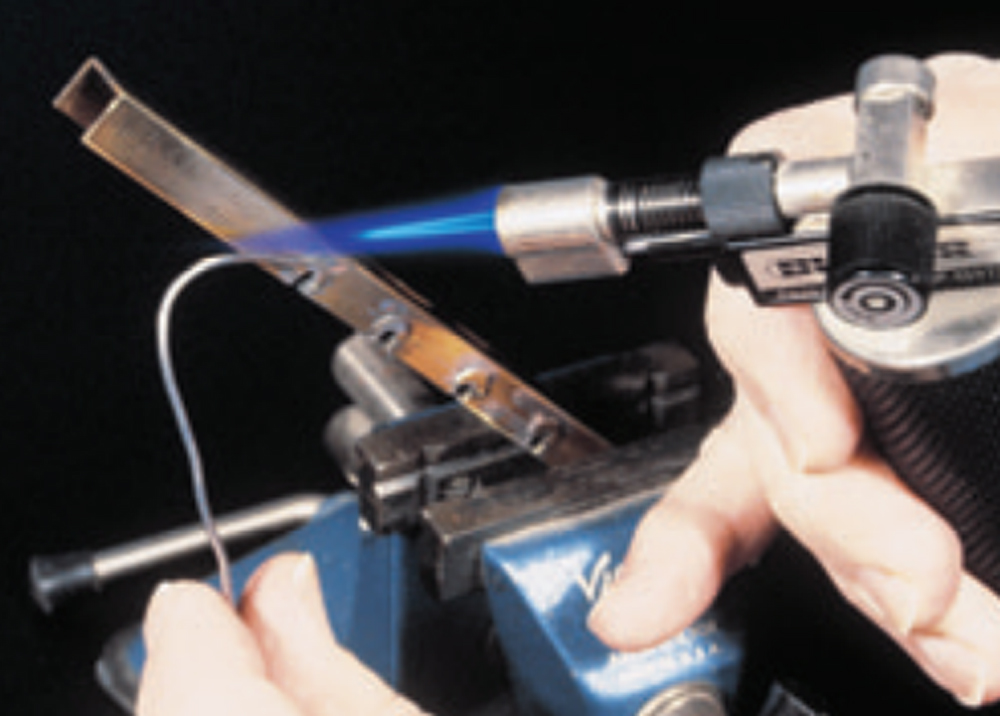
For this kind of soldering, the work is clamped in a vise and paste flux is spread over the area to be soldered. Then the parts are heated by the gas flame. Once the flux has liquified and flows over the surfaces, solder is fed into the hot joint where it melts and bonds the pieces.
Cleanup
The last, and perhaps the most important, step in soldering is cleaning the model prior to painting. Any flux that’s left on the model keeps the paint from bonding. The surface must be cleaned with a strong detergent that can lift flux out of the deepest cranny. Several cleaning methods work well, but be careful to remove any plastic parts that may be affected by the cleaner.
- Alcohol will dissolve and flush away rosin flux residue.
- Hot water and strong detergent can remove most residue if you immerse the model in a pot, bring the solution to a low boil, and keep it boiling for about 10 minutes.
Avoid having any part of the model touch the pot, which may be hot enough to melt the solder. You can suspend the model with wires from a piece of wood spanning the top of the pot. As it cools, rinse the model under warm water and gently scrub it with a soft-bristle brush. Any white residue from the detergent should come off easily during this warm rinse.
- Lacquer thinner also dissolves a rosin residue, but its use requires specific safety precautions. The worksite must be free of ignition sources with plenty of ventilation (preferably outdoors), and you need to use a two-stage respirator mask and nitrile rubber gloves to protect your lungs and skin. A natural-fiber short-bristle brush with a wooden handle can be used to scrub off any persistent flux. Then wash off the contaminated lacquer thinner with a detergent bath.
- Ultrasonic cleaners can be used with a wide range of detergents and cleaning chemicals that do an excellent job.
Once the model has been cleaned for painting, you’ll need to be careful to avoid touching it bare-handed or you’ll contaminate the clean surfaces.
Practice makes it easy
Now that you’ve learned about the process, it’s time to give soldering a try. It’s an easy skill to learn, and a little practice with scrap materials will turn soldering into a handy modeling technique you’ll be using all the time. It’s not difficult to learn the lost art of soldering!