


Freight Car Class: Lesson 2, Upgrading Kits for Better Operation | In this lesson, David shares essential steps for upgrading your model’s operation and realism.
First, you’ll learn how to use the NMRA recommended practice (ARP 20.1) to calculate the target weight for your car, and how to install a peel-and-stick weight to achieve that standard.
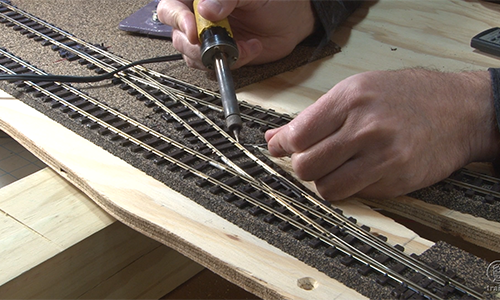
Next, you’ll discover the steps for disassembling the underframe and trucks to paint the bare plastic parts in a more authentic looking, grimy appearance. See how to swap out the plastic wheelsets for metal ones, and check that the wheelsets are in proper gauge. You’ll also learn techniques for painting the wheel faces and axles.
Finally, David shows you how to upgrade the factory applied couplers, and paint them with a rust color. You’ll finish by learning how to check and adjust the coupler height and trip pin.
For model railroaders of varying skills and any scale, class is now in session — streaming exclusively on Trains.com Video!


Just a suggestion if I may – I would have waited until you finished these steps before adding the extra weight – that way the underbody would lay flat while adjusting the truck height and coupler height on the workbench – good video as always
I would have added 2 ea 1/4 oz weights…one over each truck…get the center of gravity over the contact points.
I am curious as to how additional weight can be added to other types of cars. One, open hoppers, gondolas, and flatcars. I want to operate those type of cars empty with no loads. Two, how can additional weight be added to tank cars? And, lastly, how can additional weight be added to ready-to-run cars?
It would seem that rolling stock manufacturers would have finished products that meet NMRA standards out of the box? I understand some molding tolerances could end up giving some variation on coupler heights, but weight shouldn’t be such an issue.
Also, for my older rolling stock that I need to bring up to standard weight, I use leftover hardware washers, bolts and nuts which work fine in hidden areas of boxcars and under fake bulk loads of coal, etc. I inherited a bolt and nut collection from my late father-in-law that I am constantly looking to reuse wherever possible!
I’ve been using 1/4 oz auto wheel weights (the club I belong to also uses them) to bring my cars up to proper weight. We’ve been using the formula of 1 oz for each inch of car length and that seems to work fine. I was actually adding weight to a caboose I am working on and peeling off the back was a complete pain. I had to score the backing with a hobby knife to remove the backing. I got it though!
A light car is a derailment waiting to happen. Larry explained with his car on his channel on YouTube. If the car is too light buy some Pine Car weights at your local hobby shop and some canopy glue and mount them under the cars shell. If that does not work buy a load. All cars must be weighed so they are the correct scale weight. See the NMRA Rules of Standards and Weights found on their website.
Now that the car is built time to test the couplers. If the coupler is too low you need to install shims to raise it to the correct level. If the pin is too low you need to bend it to the correct level so it does not get hung up on points or track and cause a short.
Note that Kadee also sells a semi-scale slightly smaller coupler line that is closer in size to a prototype coupler. Matches well in operation to their standard size line and, to my mind, looks better.
LaBelle has a coupler lubricant (#112) that can be used on the Kadee knuckle and in the coupler box to improve coupler action.